If you'd like to make a donation, you can do so by visiting http://uk.virginmoneygiving.com/AlanGibson

Strange name for a blog? See here for an explanation ...

Monday 18 July 2011

Finishing Touches

Hello again, it's been a long time, hasn't it?

This will be the last post on this blog, as I think I've covered everything that I wanted to. Indeed, if it hadn't been for something that happened after I finished the London to Paris ride, I'd be finished already.

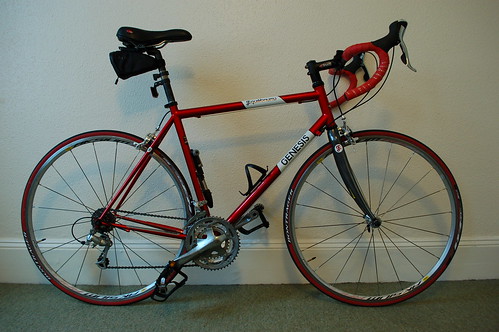
Speaking of which, the ride. I was part of a group of 140 cyclists, and we covered the distance over four days. Day 1 was 95 miles; day 2, 75 miles; day 3, 70 miles; with 60 miles on the final day. Day 3 may be the most I've ever enjoyed cycling in my life. I'm also pleased to say that, over the 295 miles, I had not a single problem with the bike at all - no punctures, pinch flats, brake issues or rough shifts. It was truly the dream machine I hoped it would be.


So, 295 miles with not a problem - wonderful. After arriving in Paris, I dropped the bike off for it to be returned to London by truck and ferry, while I soaked my aching legs in a nice hot bath. Sad to say, when I collected the bike in London, it had two dirty big gouges in the paintwork of the head tube:


Now, I'm not one for being overly precious about things, and a bike is a working machine which will pick up the odd scratch and scrape, but these seemed like two fairly hefty chunks, and I was naturally worried I'd end up with a rust problem if I didn't get it seen to.

First stop were all of my trusted local bike shops - I was sure one of them would be able to help me out, but sadly not. The best I got from them was the offer of sending the bike off to a repair shop in Bristol for a couple of weeks. I tried other shops in London, and the story was more or less the same - inconvenient locations and long waiting times.

I tried a few car bodywork repair shops, too, but none of them were interested in taking on a small job like this, and would've charged me car prices for it. Eventually it dawned on me that, if I wanted the scratches repaired, I was going to have to do it myself.

Paintwork was never on my agenda when I started this project. On occasion, I've had to paint the odd wall in my flat, but the outcome has always been a bit like this. Faced with no alternative, however, I went over to Halfords, not quite sure what I needed, and came back with:

  • A spray can of red primer
  • A spray can of red paint for an Audi
  • A spray can of lacquer
  • A packet of paint preparation wipes
  • Some fine grit wet and dry sandpaper
  • Masking tape
Thus equipped, I took the bike outside and set to work. First was the masking tape, masking off as much of the down and top tubes as I thought I'd need to, the crown area of the forks, and the cables. I left the scratched area exposed in a rectangle, to give a nice clean finish.

I then sanded, cleaned and dried the scratched area, and applied a couple of coats of primer, at 15-minute intervals. The nozzles on the spray cans weren't especially ideal for the sort of detailed work I was attempting to do, having been designed for use on larger areas, but it worked pretty well.

Following that, I went to the pub for a bit, and had a cracking Indian lunch at Bangalore Express, while the primer dried. On my return, I sanded and cleaned again, and then put on three or four coats of paint, and left that overnight to dry.

The next morning ... sand, clean, lacquer, repeat. And then ... the moment of truth ...


... peeling off the masking tape ...


Well, it's not exactly a good colour match, but it's covered up the scratches pretty well, which is what I was looking for. The marks you can see above and below the painted area are just the leftovers of the adhesive from the masking tape, but some sugar soap will take care of that.

And so concludes Cycle Maintenance for the Mechanically Gifted. Thank-you for reading!

Sunday 12 June 2011

Stand

As you read the last time around, the bike build is finished, but there are a few things I've forgotten about that I'm going to go back over.

I've found that the fiddliest but most satisfying maintenance job to do is derailleur adjustment. You may have guessed this from the number of times it's figured in my posts here. I've found it to be an inexact science, and I've yet to get it right first time, but when you can change gear instantly and silently, with no clicking or grinding or chain rubbing, cycling becomes a thing of beauty.

It's also impossible to do it properly without a stand:

My bike in the stand, rather mucky after 40 miles in the rain this morning.
Adjusting your derailleurs means constantly changing up and down gears, front and back, up and down, until everything is in sync and running smoothly. It's just impossible to do that with your back wheel on the ground.

I went for a folding bike workstand from Halfords, which cost me a quid short of £100, but it's been worth every penny. It's a fairly heavy piece of kit, with three folding legs which open out and take the weight of the bike. As you can see from the photo, an arm with a clamp grips the bike - generally I clamp the top tube, but if I'm working on the rear brakes I have to clamp it on the down tube or the seat post, to avoid trapping the brake cable.


The top tube clamped in the stand, with the quick release lever visible.
It's a sturdy piece of equipment, ideal for the sort of frequency of use I get out of it. All the angle adjustments of the stand, and the clamping arm, use quick release levers. They're not the tightest when in the tight position, but they don't slide around too much. If I was working on bikes all day every day, I'd probably want something a bit higher-end, but it's ideal for me.

Tuesday 31 May 2011

Putting it all together

Poetically enough, the final link in the chain of building the bicycle was fitting the chain. (And slightly less poetically, installing the gear cables, but let's ignore that for the moment.)

I went through quite a faff to get the chain to the right size, but you can save yourself the trouble by watching this handy video:


That describes it far better than I ever could. About the only thing I'd add is that I can't say enough about how useful quick links are. In the past, I've fitted Sram chains that use quick links, and it's a doddle.

This time, though, I had a Shimano chain and connector pin. The connector pin has a "leader" part which you push right the way through the link, and the theory is that you use a chain tool to do that, then cut the leader bit off with bolt cutters or somesuch. This was, indeed, a faff, and I ended up using a hacksaw to cut the leader off. I'm sure you're not supposed to do that.

With the chain at the correct length and fitted to the bike, it's time for the last bit - fitting the gear cables and tightening them to give you nice, smooth shifts. For this, I'm again going to refer you to a video that explains things much more clearly than I ever could.


This actually covers removing old cables before fitting new ones, but the same principle applies. Personally, I found that fishing the cables through the shifters was a bit tricky, but a little bit of perseverance got the job done.

And that's it!

Monday 30 May 2011

On training

Over the weekend, I realised that I hadn't yet made any mention of the training I've been doing for my ride to Paris. When I started writing here, it was with the express intention of it not becoming a training diary - to my mind, there's little duller than blow-by-blow accounts of the daily activities of someone else's life. Nonetheless, there are some things regarding my training which it would be remiss not to mention. Maybe some of you have even been wondering about it! (Unlikely, I know.)

First, the goals of my training: to get myself in condition to complete the ride from London to Paris, and beyond that, enjoy it. The ride is over four days, with the mileage covered per day being 95, 75, 70 and 60 respectively.

Second, my training so far: I did a 60-miler along with Nick at the beginning of May, which went reasonably well. Before and after that, I've been packing my training mainly into the weekends, on rides varying in length from 20 to 40 miles. The abundance of bank holidays in April and May has been immensely helpful in this respect.

Third, my target: I'm aiming for an average speed of 15 mph across the four days of the ride. This would work out at about six hours riding on the first day, and four on the last day. I managed to maintain 15 mph reasonably comfortably on the 60-miler, and I've been able to hit that consistently on my other training rides too.

Fourth, other training: I haven't exactly been going out of my way to get punctures, but I've been trying to view them as good practice for doing quick changes on the ride itself. The best I've done so far is 10 minutes to change the inner tube on the back wheel and get it back on, but I'm sure I can do it more quickly than that.

Lastly, where I've been training: I'm lucky enough to live close to Richmond Park. London's biggest park, it's a haven for cyclists at the weekend, for obvious reasons - little traffic, good roads, lovely scenery, and a few little uphills and downhills too. I can't say enough good things about the setting. Sometimes the only colour you can see is green, and you forget you're on the edge of one of the world's largest cities, then you turn a corner, the trees part, and you see the towers and wheels of London's famous skyline.


View Larger Map

Roads run  around the perimiter of the park, in a more-or-less square shape, forming a route which is roughly six miles long. I live just under three miles from Richmond Gate, so once around the park and getting to and from it is 12 miles. I've tended to think about my rides as much in terms of number of times round the park as in absolute distances - twice round is 18 miles, five times round is 36 miles, and so on.

The park is at its busiest with cyclists early in the morning, but I actually prefer late afternoon and early evening rides. Part of that's no doubt because I'm not much of a morning person, but later in the day you also tend to get far fewer wankers riding three-abreast, pretending they're in the Tour de France peloton and unnecessarily holding up cars.

Here ends everything you'll ever hear from me about training. The rest of it's just about keeping the pedals turning ...

Friday 20 May 2011

R: Tape Loading Error

Like many boys of my generation, I spent a large proportion of my youth fiddling with cassettes.

Image courtesy of Wikimedia Commons

Building the bike has required fiddling with cassettes of a different kind:

Image courtesy of Wikimedia Commons
The cassette above is a Shimano Dura ace, whereas I fitted a Shimano Tiagra cassette to my bike. It fits onto your back wheel, and is the part that your chain hooks on to, providing the "drive" that moves you forward. My cassette has 9 rings - the largest ring is the lowest gear, the smallest ring is the highest gear.

Here's my back wheel, before fitting the cassette:


The rings of the cassette slip over the larger grey spindle on the right-hand side. As with all cleverly-designed things, there are different-size notches on the inside of the rings, which correspond to matching notches on the spindle. That means you can't put the rings on in the wrong alignment.

Once all the rings are on, it's secured with a "cap" that requires a special cassette tool to tighten:

Image courtesy of Wikimedia Commons
The narrow end fits onto the cap, and you can use a normal spanner to do the tightening.

With the cassette fitted, you're now ready to fit the wheels and put everything together!

Thursday 19 May 2011

Right Round Baby, Right Round ...

One of the most interesting things for me about building the bike has been how quite a few of my assumptions on how a bike works and what it's made up of have been challenged or shown to be complete nonsense. So it is with wheels.

For example, I'd always assumed that front and rear wheels were more or less identical.

Not so, as these photographs of my Mavic Aksium wheels show.

This is my rear wheel:


And this is my front wheel (the one on the right):


Spotted the difference? 

That's right - the spokes on one side of the rear wheel are "flat", so to speak - they stay within the plane of the rim. That's the side which the cassette (more on that later) attaches to. The amount by which the spokes come out of the plane of the rim is known as the "dish".

In all the years I've ridden bikes, and all the times I've taken back wheels off to mend punctures, I'd never noticed that, up until I saw those two wheels.

Saturday 14 May 2011

The finished article


I think I've probably mentioned it already, but in case I hadn't, the bike build finished about a month ago. A combination of determination, plentiful supplies of grease, and the Manowar back catalogue pushed me over the hump and I got it finished in time to make the best of the great weather we had here in April.

I was planning to leave posting photographs until I'd finished describing every stage of the build, but I've had some requests for pictures, so here goes:

DSC_2717.JPG by alan_gibson01
DSC_2717.JPG, a photo by alan_gibson01 on Flickr.
You can see more in this Flickr album.